

Before You Start
You need:- A Mac or Windows PC that meets the System Requirements.
- REAPER 7.0 or later (reaper.fm), on the same computer and user account as Reagent.
- Enterprise accounts: an endpoint URL, API key and model ID from your IT team.
- The free SWS extension for REAPER. Reagent needs it to work with media items and doesn’t warn you if it’s missing, so install it first.
How to install SWS
How to install SWS
- Quit REAPER.
- Download the version for your platform from sws-extension.org and follow the install instructions there.
- Open REAPER, choose Actions > Show action list… and type
SWSin the Filter box. If you see actions that start with SWS/S&M:, SWS is installed.
1. Download and Install Reagent
You don’t need an account yet. You create one or sign in from the app in step 2.- macOS
- Windows
- Go to reaperagent.com/download and click Download for macOS.
- Open the
.dmgfile and drag Reagent into your Applications folder. - Open Reagent from Applications.
2. Sign In
Sign-in happens in your web browser, not inside the app. While you sign in, Reagent shows Waiting for browser… with a Cancel button.- Individual plans
- Enterprise
- In Reagent, click Sign in to Reagent. Your browser opens the Reagent sign-in page.
- Type your email.
- Have an account? Enter your password and click Log in.
- New to Reagent? Click Sign up when the page says No account found for this email. Enter your name, email and a password (at least 8 characters), then click Create account. If the page says it sent a confirmation link, click it in the email.
3. Answer the Welcome Questions
The first time you sign in, Reagent asks a few questions to set up your profile.- Click Get Started.
- Enter a Display Name and click Continue.
- On Tell us about yourself, answer and click Continue, or click Skip.
- Click Start Chatting.
Connect Your Organization’s AI Endpoint
This section is for Enterprise accounts. Individual plans, including the free trial, skip to step 4, because Reagent provides the AI model. Reagent sends your requests to your organization’s own AI endpoint. After the welcome questions, or right after sign-in on another computer, a Custom Endpoint window asks you to connect it. You can’t close it or use Reagent until an endpoint works, and its only other option is Sign out.1
Enter the details from your IT team
Endpoint URL, API key and Model ID are all required. The URL must start with
https://, unless the model server runs on your own computer (localhost). Leave Provider, API, Reasoning effort and Advanced at their defaults unless IT says otherwise.2
Click Apply
Reagent tests the endpoint before it saves anything. When the window shows Connected, click Continue.If the test fails, read the error under Apply and check the details with your IT team. If Reagent can’t reach the endpoint at all, check that you’re on your organization’s network or VPN. See Enterprise Endpoint Errors.
4. Connect Reagent to REAPER
Each time Reagent starts, it copies the Bridge script,reagent_bridge.lua, into a reagent folder inside REAPER’s Scripts folder. You load it into REAPER’s action list once on each computer.
1
Open REAPER's action list
Open REAPER (any project works) and choose Actions > Show action list….
2
Load the script (first time only)
Click New action… and choose Load ReaScript…, then browse to the Select
reagent folder for your platform:On macOS, if you can’t see the
Library folder, press Cmd+Shift+G in the file dialog and paste:reagent_bridge.lua and click Open. The list now shows Script: reagent_bridge.lua.REAPER uses a portable install or a different resource folder
REAPER uses a portable install or a different resource folder
Tell Reagent where it is in Settings > Connectors first. Then browse to the
reagent folder inside the Scripts folder you chose, not the one in the table.The green Script Installed status there only means the files are in place, not that the Bridge is running. See REAPER in a Custom Location.3
Run the Bridge
Select Script: reagent_bridge.lua and click Run. The Bridge runs in the background and doesn’t open a window. From now on, run this step each time you open REAPER, unless you start the Bridge automatically.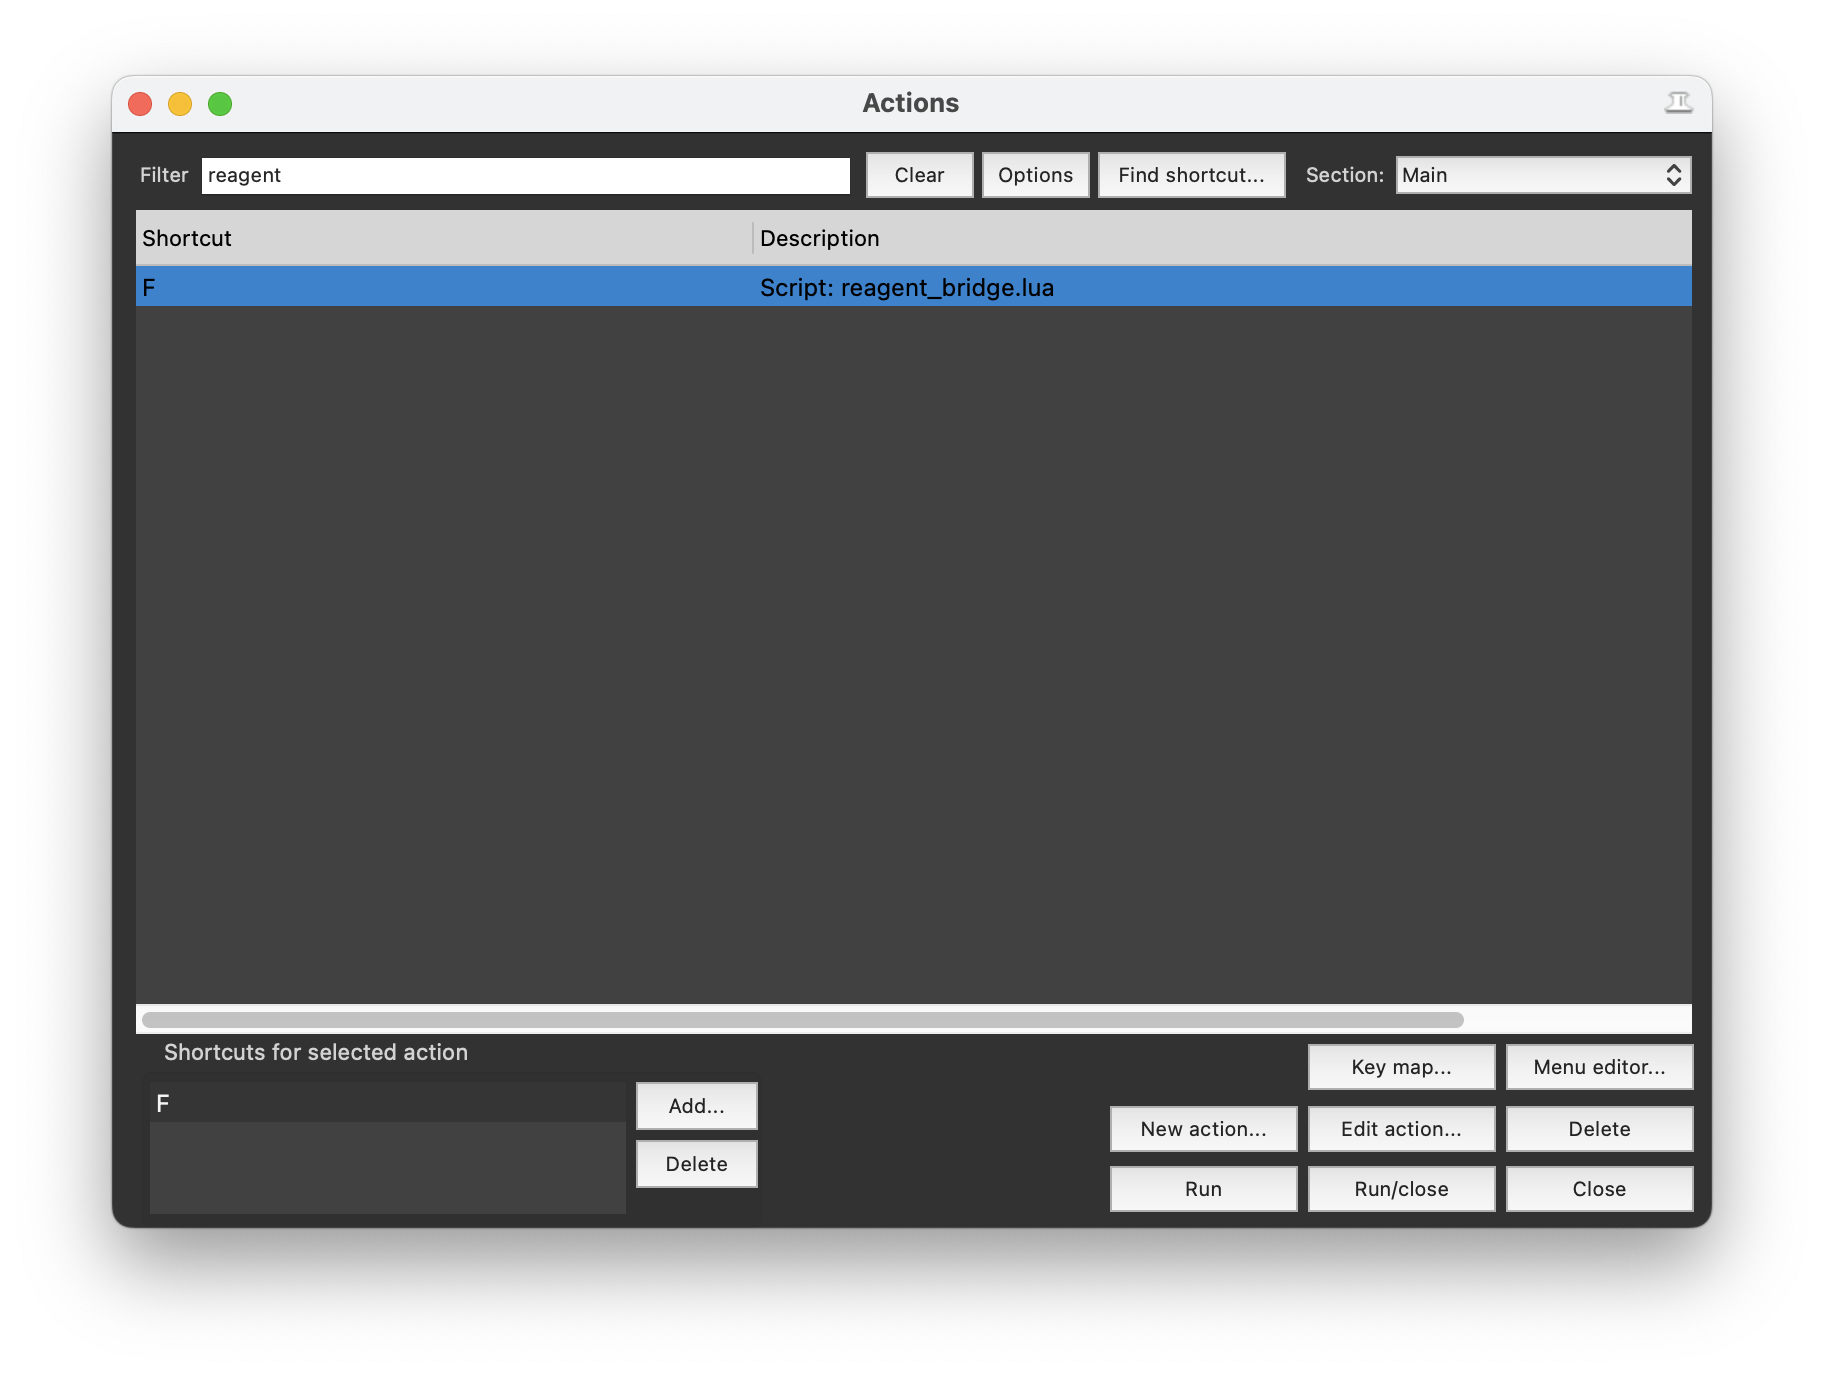
4
Check the connection
In Reagent, ask:Reagent has no connection light. It checks REAPER each time you send a message, and tells you to run the Bridge script if REAPER isn’t connected.
5. Send Your First Request
Reagent sees what’s selected in REAPER, including tracks, items, the edit cursor and the time selection. Try your first few requests on a copy of a project.- In REAPER, select a track.
- In Reagent, type a request in the box that says How can I help you today? For example:
- Press
Enterto send, orShift+Enterfor a new line. - Before Reagent changes your project, it shows what it wants to do. Click Allow to go ahead, or Deny to skip that change and let Reagent carry on. From the keyboard,
Cmd+Enter(macOS) orCtrl+Enter(Windows) allows, andEscdenies and also stops the reply.
Cmd+Z (macOS) or Ctrl+Z (Windows). See Undo and Recovery.
More requests to try:
Start the Bridge Automatically
The Bridge stops when you quit REAPER. To have it start whenever you open REAPER, make it SWS’s global startup action. It’s optional, but it saves a step every session.1
Check for an existing startup action
SWS keeps only one global startup action, so this replaces any you already have. To check, run SWS/S&M: Show project/global startup actions in the action list.
2
Copy the Bridge's command ID
In the action list, type 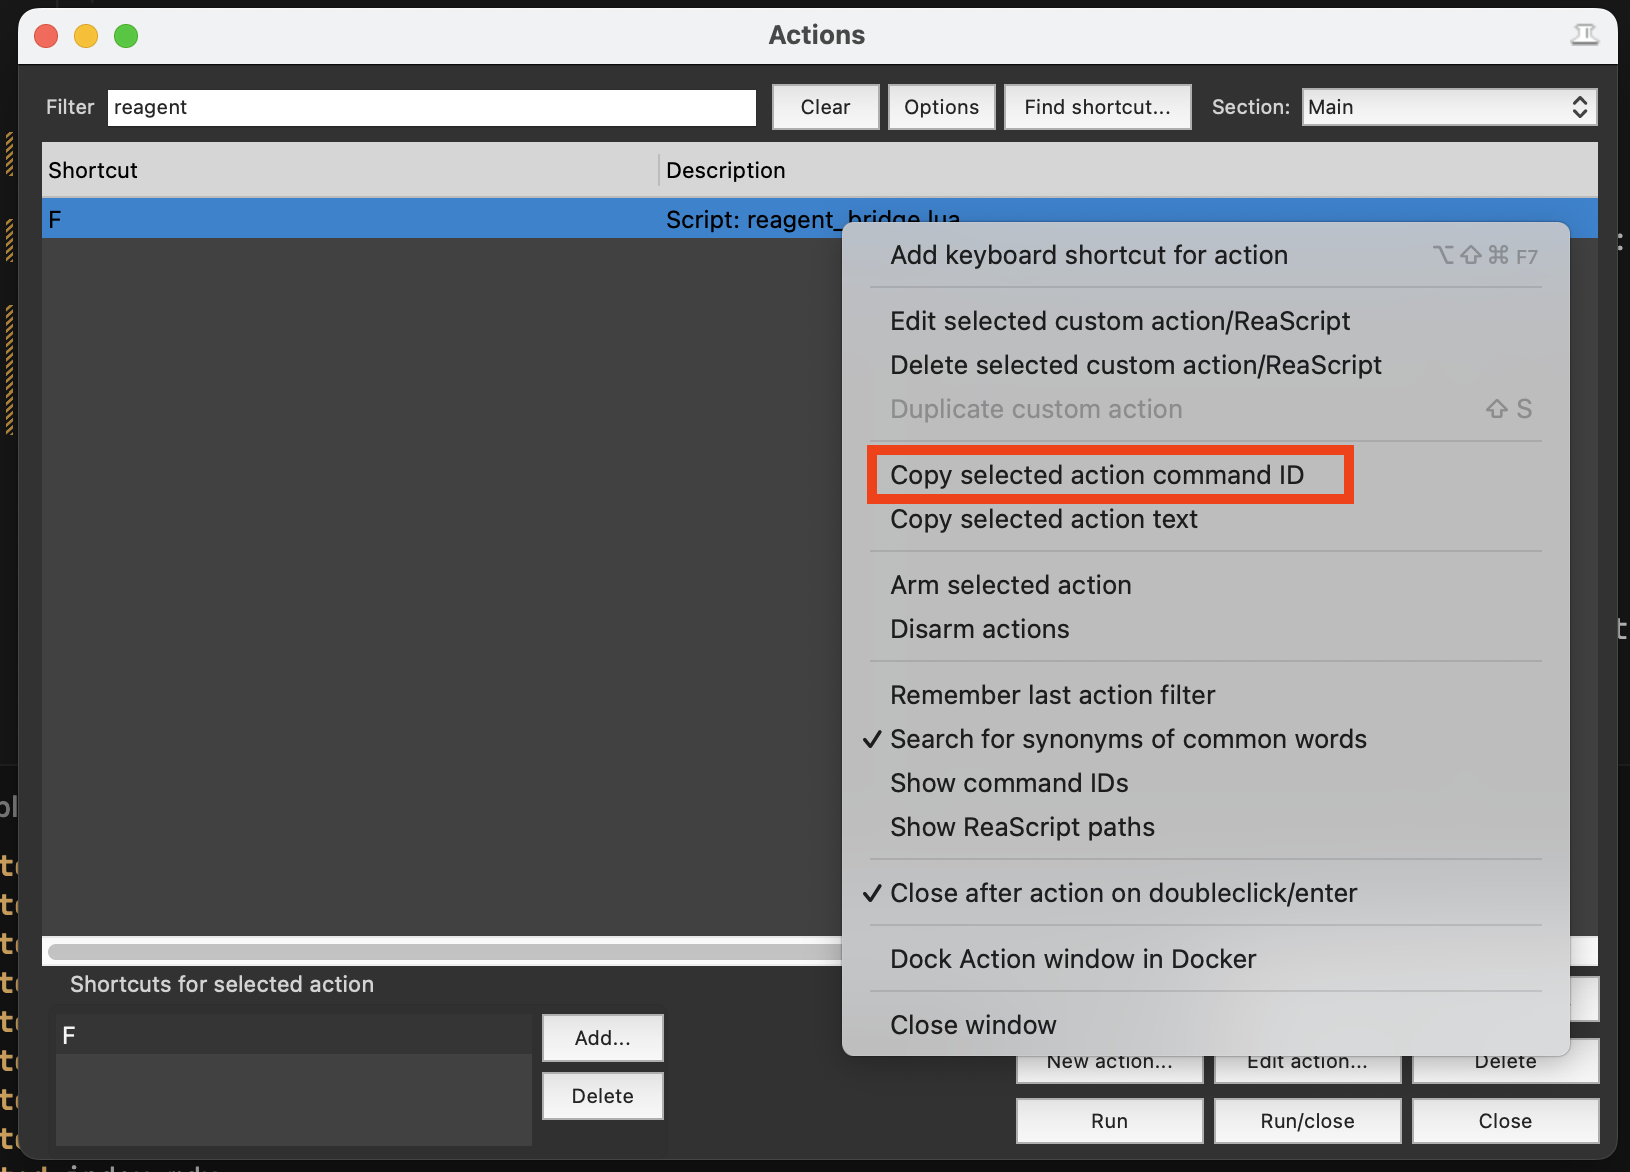
reagent in the Filter box. Right-click Script: reagent_bridge.lua and choose Copy selected action command ID.3
Open the SWS startup action setting
Change the filter to 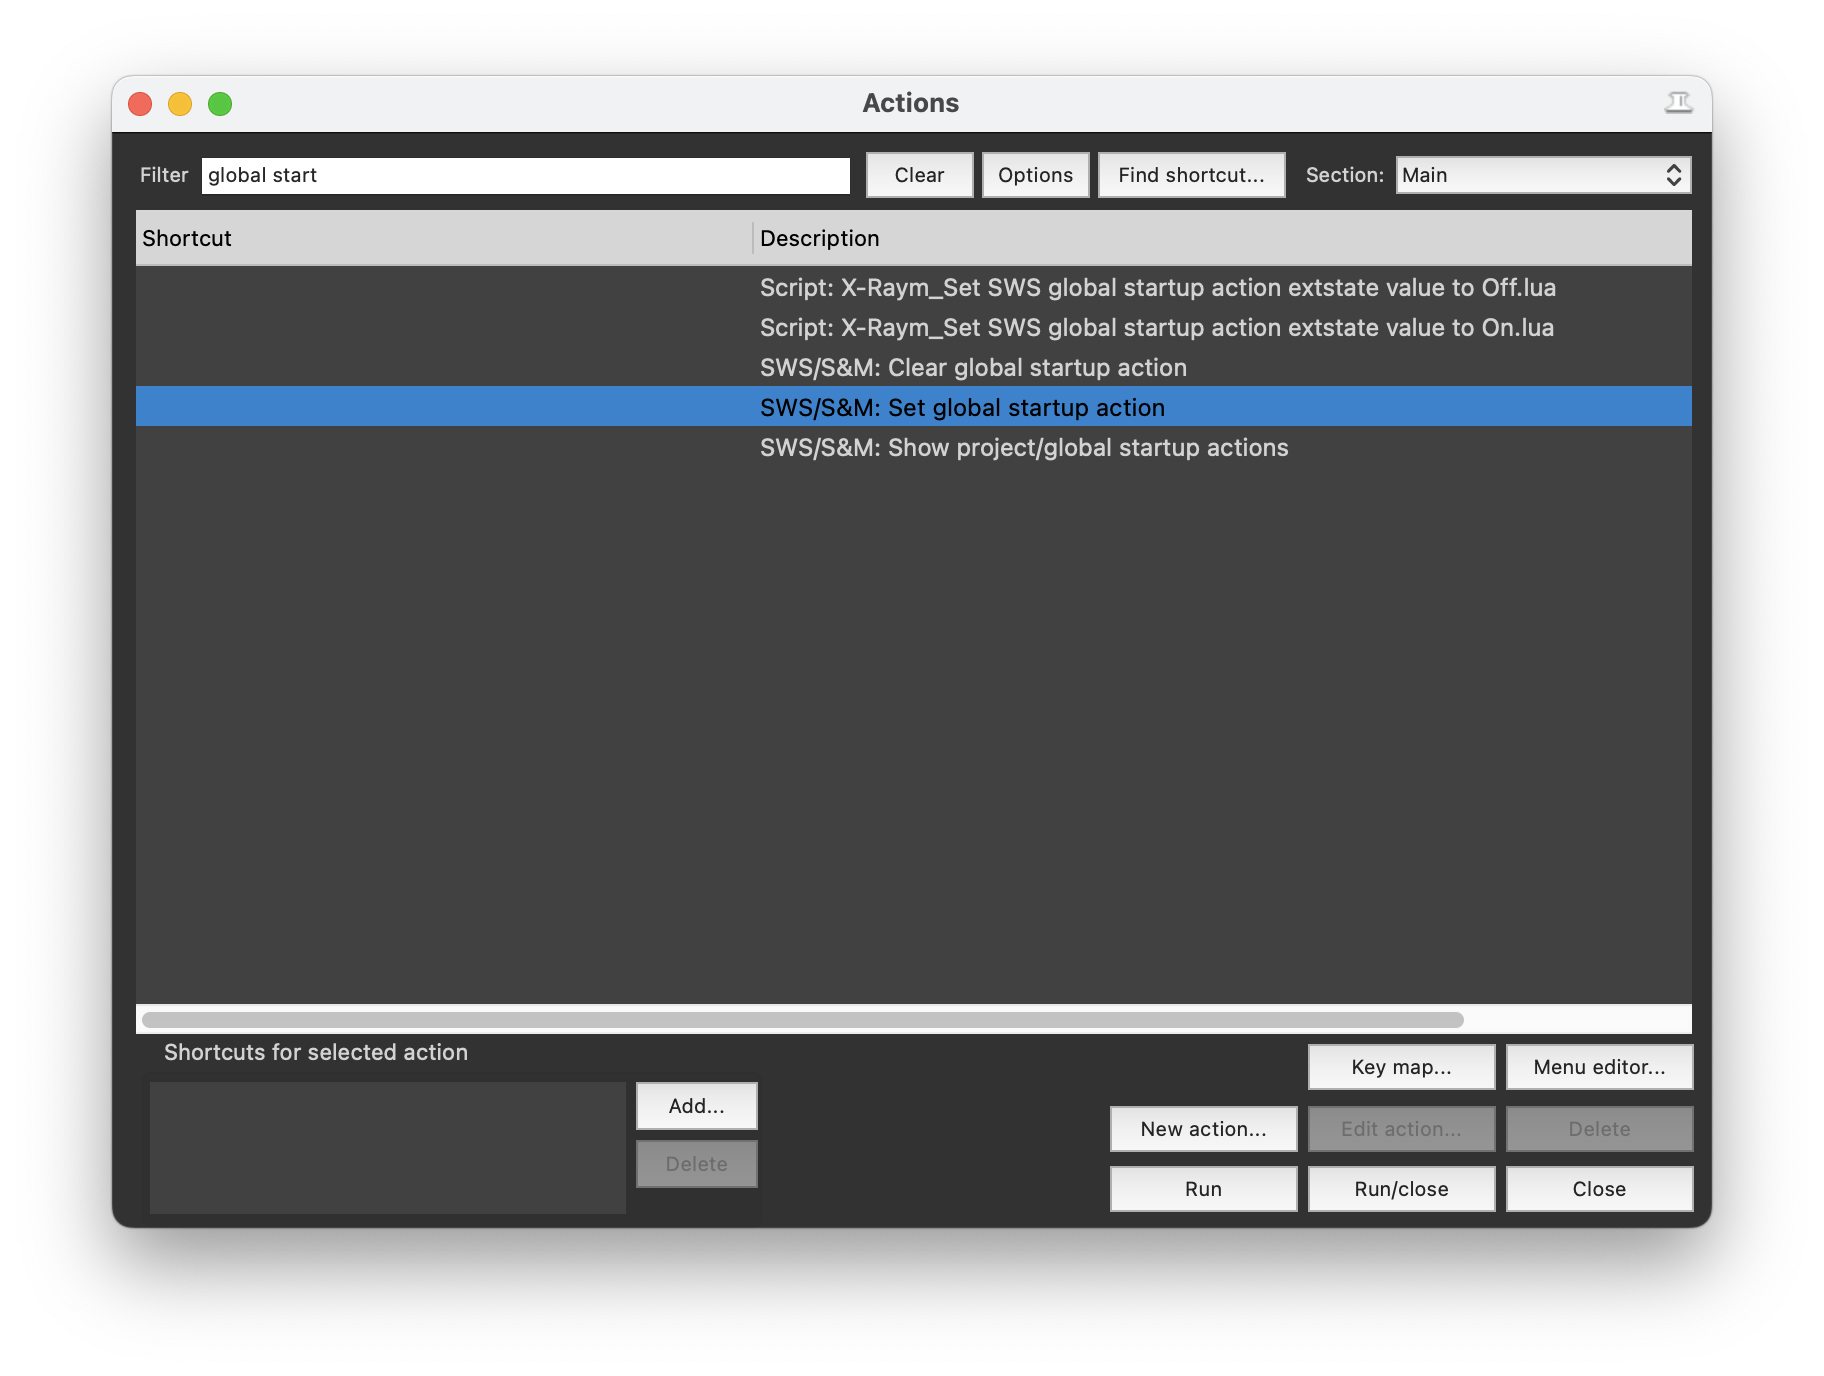
global start. Select SWS/S&M: Set global startup action and click Run.4
Paste the ID and save
Paste the command ID into the Set global startup action box and click OK. From now on, the Bridge starts whenever you open REAPER.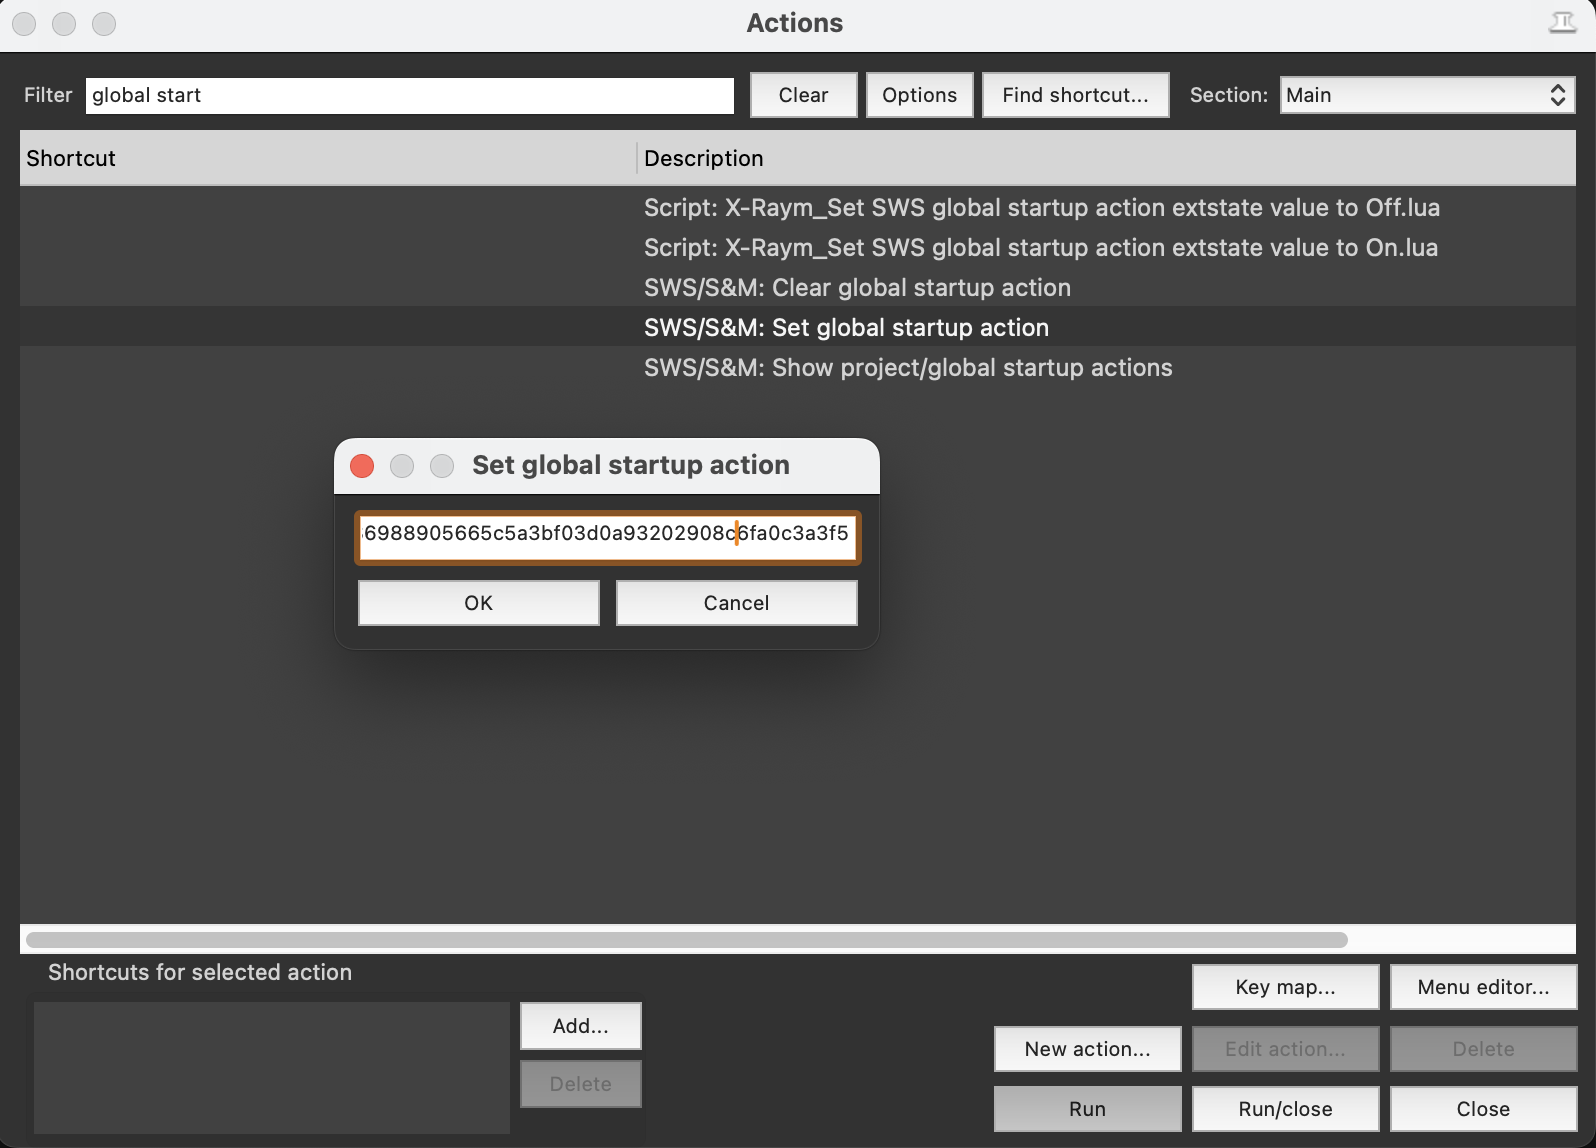
Set Up Another Computer
Your account and profile follow you, so a second computer skips the welcome questions. REAPER setup is per computer, though. On each new computer:- Install REAPER and SWS (Before You Start).
- Install Reagent and sign in (steps 1 and 2).
- Enterprise accounts: enter your endpoint again when the Custom Endpoint window opens (Connect Your Organization’s AI Endpoint).
- Load and run the Bridge (step 4), and optionally start it automatically.
If Something Doesn’t Work
Sign-in doesn't finish, or the browser doesn't take me back
Sign-in doesn't finish, or the browser doesn't take me back
If the Opening Reagent page shows an Open Reagent button, click it. Reagent waits up to 10 minutes for you to finish in the browser. If you take longer, close the tab, or the button doesn’t work, click Cancel in Reagent if it’s still waiting, then Sign in to Reagent again.
Searching for reagent_bridge in the action list finds nothing
Searching for reagent_bridge in the action list finds nothing
REAPER only lists the script after you’ve loaded it once. See step 4.
Reagent shows REAPER bridge not installed
Reagent shows REAPER bridge not installed
Reagent couldn’t copy the Bridge files. Click Setup to open Device Setup. It installs the files and walks you through steps similar to step 4.
Reagent says REAPER isn't connected
Reagent says REAPER isn't connected
Usually the Bridge isn’t running. Run it (step 4), then send your message again. If Reagent recently updated, quit and reopen REAPER first.Still not connected? Close any open dialog box in REAPER. If that doesn’t help, deselect all media items and ask again. If Reagent now connects, SWS is missing. See REAPER Connection Problems.
Item requests fail or mention SWS
Item requests fail or mention SWS
If an error says REAPER rejected the operation and Show details mentions
BR_GetMediaItemGUID or SWS, SWS is missing. Install it (Before You Start), then restart REAPER and run the Bridge, or let the startup action run it. See SWS Extension Missing.Reagent shows Bridge Updated
Reagent shows Bridge Updated
The update includes a new version of the Bridge. Quit and reopen REAPER, then run the script, or let the startup action run it. You don’t need to load it again.
Related
Chat
Talk to Reagent, attach files and follow its work.
Permissions
Choose how often Reagent asks before it makes changes.
Example Workflows
Practical prompts for everyday jobs in REAPER and Wwise.
Best Practices
Write clear requests and keep your projects safe.